Saturday, December 30, 2017

Blueberry Pomegranate Smoothie


It's officially winter, and we are certainly feeling the season with colder than normal temperatures, rain, and little sunshine. Although, I am so thankful the solstice has come, and the days are slowly but surely beginning to lengthen. Spring seed catalogs arrived in the mail this week, so I have been flipping through and marking page after page of seeds to order, listening to music, and spending time with my family in this lazy week between Christmas and the new year. Christmas gathering foods were so good, and we indulged happily! But this week, we have been in the kitchen preparing veggie and protein filled meals and fruit smoothies for simple snacks. I have been making this blueberry pomegranate smoothie for the last several days, and it has become a favorite! It's packed with lots of antioxidants and vitamin C and is anti-inflammatory for those of you whose bellies don't love holiday food as much as you do. I hope it makes you feel good. And cheers to the end of another year, friends. See you in the next.

Blueberry Pomegranate Smoothie

Ingredients:
1/2 cup frozen blueberries
seeds from 1/2 pomegranate
1 Meyer lemon quartered and peeled
1/2 cup unsweetened almond milk
2 teaspoons agave syrup 

Put all ingredients into a high speed blender and blend until smooth. 
Add a handful of ice and blend until consistency desired is reached. 
Enjoy!

Note: My favorite way to deseed a pomegranate is using the wooden spoon trick


Tuesday, December 5, 2017

Nourishing Winter Meals


I'm not even ashamed to say that this time of year has never been my favorite, and I know I'm not the only one. Give me all the long slow summer days please. A few years ago, I converted to Catholicism, and since that time I have come to appreciate this time of year so much more and use it to heal and nourish my heart. And as much as I look forward to holiday meals and drinks with friends and family, I try and keep the rest of our meals at home as simple and as nourishing as possible. The simple part mainly because it feels like 10PM when we get home from work and I'm starving! The meals listed below are some of our very favorites that we repeat over the winter months. I hope you are able to get lots of physical and spiritual nourishment this season, whether by religion or in any other peace and love filled way.

A Simple Carrot Soup

Chicken Pesto Zucchini Noodles

Quick Pho

Pan-Roasted Chicken with Tarragon and Mustard Cream Sauce (I usually roast whatever veggies I have on hand to go along with this, sweet potatoes are a favorite!)

Photo via


Sunday, September 17, 2017

Blush Tank


I finished my first knit garment this weekend. It has a few rows of twisted stitches from frogging and placing the stitches back on the needle incorrectly, several loose stitches that look like holes, and the seaming and woven ends look quite messy despite the immense care that I put into finishing it. But I am so proud of it, mistakes and all.

The pattern is Breezy by Erika Knight made with Wool and the Gang's Shiny Happy Cotton yarn in the colorway Nude Pink. My gauge was a bit small, but I didn't want to go up a needle size, so I just made a size bigger than I normally would. I also lengthened the body a bit and shortened the length of the straps to have a higher neckline. I loved working with the soft cotton during our extreme southern heat, and I'm so happy to have finished it in time to get some wear out of it before our cool weather makes an appearance. Now onto finish my first knit sweater for whenever fall decides to show up!

Thursday, August 17, 2017

Roasted Peaches with Coconut Cream


It's peach season ya'll. and I can't get enough. I actually prefer unripe peaches to the softer ripe peaches. My husband tells me I eat them wrong, ha! But, for roasting I prefer the ripest I can find. I have been using a coconut creamer for my tea and coffee from The Sprouted Kitchen that takes the cake when it comes to dairy free creamers. It's a bit thick, which makes it perfect for a cream topping. I decided to pair it some roasted peaches for a light quick dessert and the outcome was SO good. I hope you enjoy. 

Ingredients

A few spoonfuls of The Sprouted Kitchen's Coconut Creamer (Optional: make in advanced and store in the fridge. Remaining creamer can be used in your tea or coffee.)

1 ripe peach peeled and sliced

1/2 tablespoon of butter

1/2 tablespoon of light brown sugar

Preheat oven to 400°F. Melt the butter and mix in the peach slices. Add the brown sugar and toss to evenly coat the peach slices. Bake for 20-25 minutes. Remove from oven and plate with a spoonful or two of coconut cream. 

Wednesday, July 26, 2017

Buffalo River for Quince and Co.


Crochet week is back over at the lovely Quince and Co., and my contribution, Buffalo River, was released today. Buffalo River is a crocheted wrap filled with texture and warmth. I used Quince and Co.'s fingering wool yarn Finch in their beautiful heathers, Audouin and Caspian. Its rustic and cozy feel was inspired by the contentment felt while pouring yourself a cup of warm coffee in the comfort of your own home, enjoying a fire with loved ones on a crisp night, or overlooking a beautiful peaceful landscape. This wrap is meant to accompany you wherever your heart is full and content. I hope you enjoy the new design and give the other beautiful patterns from the Crochet 2017 Collection a look!


Friday, July 21, 2017

Little Things


The Little Things posts are links to a few things I am loving lately. A good day revolves around good and happy moments, gratefulness, and  sometimes delighting in little things that make your heart smile. I hope these links bring a little joy to your day, too. 

A glad heart is excellent medicine.
Proverbs 17:22

An article about wholehearted living that relates so well to present day distractions.

There are very few foods I won't eat. Beets used to be one of them. But, when our CSA boxes were filling our produce drawers with them, I knew I had to give them another shot. Now I have a handful of delicious go-to beet recipes and this one is one of my favorites!

This Biches & Buches knit wrap pattern in the new Laine magazine has me swooning!

And this photo I came across on Pinterest has my heart melting. 

On another note, last year my community suffered a great natural disaster. In August of last year, about 70,000 houses flooded including many of my family members and friends. My company is currently playing a small part in the Restore program to assist people in restoring their homes. In almost a year, there are so so many still not home. I've had the privilege to  visit many households and hear their stories. Not only flood stories, but the other sufferings that life throws at each one of us. Throughout every unique circumstance, these warriors keep a brave face and positive outlook, but they are suffering all the same. So my sweet online community, will you please continue to keep my local community in your thoughts and prayers? Please remember them, and remember to be kind and love one another. We all have our crosses we bear every day. 

Saturday, July 8, 2017

Summer Tea Cocktail for TLBC


Working with other creatives is such a treat to me, since my day job consists of so much technical talk and thinking. So when Hope from The Little Blue Chair reached out to collaborate on a summer drink recipe, I happily obliged. Hope owns and runs the most beautiful letterpress company from her quaint home studio in the town I grew up in. I didn't have the pleasure of meeting her in my youth, but I am so happy we were able to connect as adults. Head on over to Hope's site for the recipe and some breathtaking paper goods. Have a happy weekend friends!


Tuesday, June 6, 2017

French Market Tote for Taproot Magazine


The summer issue for Taproot magazine, GROW, is out, and I am delighted to be part of it. In its pages, you will find my contribution, a summery linen market bag with French stripes. Most days, I am so grateful I was born, raised, and set my own roots down in southern Louisiana. I highly dislike the cold and prefer the sunshine and hot sticky climate of home. This hot sticky climate of ours also allows for a very long growing season with produce stands lining the highways almost year round. It's wonderful! What's even more wonderful is how generous our little southern community is. Friends and neighbors are quick to share bagfuls of satsumas, figs, tomatoes, eggplant, and even some fresh caught catfish or reds. Although we can grow most of the year, summertime gives not only the highest yield but the most delicious pickins in my opinion. Our pantry is filled with sweet corn, summer squash, watermelon, peaches, carrots, and so much more. One of the many reasons that summertime will always be my favorite. This special growing season and my sweet kind community inspired this design. I hope that your version is filled with all the love and goodness mine is filled with.


A few technical notes about the design: The tote is worked in pieces with the main panels having striped colorwork, and then seamed together with a visible seam.  I chose a bright red for my stripes, but I think blue or white would look just as lovely. I also added some leather straps for the handles, but a pair of crocheted i-chords would make beautiful and sturdy handles as well. You can find the pattern on Ravelry and buy your copy of GROW here.


Monday, May 22, 2017

Green Tomato Salsa


I love a good salsa verde. So fresh and scrumptious. Over the weekend, I found myself making a batch using some tart green tomatoes I had on hand in lieu of tomatillos. I adapted this recipe for a smaller batch of salsa, and the result was delicious. I may have snacked on it all weekend long as hot sticky thunderstorms passed through. If you happen to find yourself with a few handfuls of green tomatoes, you should give this version of salsa verde a try. It's relatively easy to throw together for a party or just for a snack when you're stuck at home in the rain.


Ingredients:

4 cups chopped green tomatoes (about 4 medium green tomatoes)
1 white onion peeled and quartered
2 cloves garlic peeled
1 jalapeno pepper seeded and quartered
1/2 bunch cilantro
1/4 cup lime juice
sea salt to taste

In a food processor, add the onion, garlic, and jalapeno. Pulse until all veggies are finely chopped. Add the veggies from the food processor to a pot with the chopped tomatoes. Add the lime juice and bring to a boil. Turn the heat down and simmer for about 10 minutes. While the salsa is simmering, place the cilantro in the food processor and pulse until finely chopped. Remove the salsa from the heat and add in the cilantro and salt to taste.

Friday, May 5, 2017

Little Things

The Little Things posts are links to a few things I am loving lately. A good day revolves around good and happy moments, gratefulness, and  sometimes delighting in little things that make your heart smile. I hope these links bring a little joy to your day, too. 


A glad heart is excellent medicine.
Proverbs 17:22

A great article about propagating rosemary AND using raw honey as a natural root hormone.

This beautiful flower-filled interview with Jessica of A Fine Medley.

I made this carrot soup this week during a stormy night and served it along side a fresh spring salad. I highly recommend! 

My mom gifted me the Modern Natural Dyer book for my birthday, and it has inspired me so much. I saw this little zipper pouch the other day, and now I'm dreaming of making a naturally dyed version to practice my embroidery skills on. 

Have you heard of this organization before? They help bring basic needs to individuals, organizations, and communities to help them focus on bigger goals with efficient and structured programs. 

This baby lamb from Ashley Yousling's farm is just melting my heart away. 

I listened to this podcast this week about zero waste, and I'm already making small changes to reduce waste in our home. So good. 

I added this pattern to my summer make list, in a soft white and leaving off the ribbing. 

Happy Friday sweet friends!

Photo by Jess Kneebone

Tuesday, April 25, 2017

Whipped Feta and Pecan Squash Blossoms


A delicacy found only in the early growing seasons of spring and fall, squash blossoms are the quiet humble parents of zucchini. The beautiful vein leafed yellow flowers are the first signs of a good vegetable harvest and easily overlooked as a harvest themselves. Because there are usually more male flowers than female flowers, the males (no squash attached) can be harvested and enjoyed in salads, pastas, quiches, or anything your taste buds can imagine. I think that there is something inherently magical about flowers, whether giving life to a home or love to a dear friend, or yes, even filling our bellies. There is definitely something special about nourishing ourselves with flowers! I was happily surprised to find a bagful of these blossoms in our weekly CSA from Indieplate, which just so happened to be dropped off a few days before my birthday. I didn't have a specific plan or recipe in mind, but my growling stomach and a few other fresh ingredients I had on hand made for a perfect afternoon birthday treat. So here is my southern take on this beautiful magical food, because my taste buds think the best way to enjoy them is deep fried with sunshine, bare feet, and most certainly fresh strawberry beer. 


Ingredients:

1/2 cup feta
1 ounce cream cheese
1 handful of pecans
5 squash blossoms
3/4 cup flour
Pinch of sea salt
6 ounces Parish Brewing Co. Strawberry Canebrake (can substitute beer of choice or club soda)
Canola or vegetable oil

Recipe:

Gently wash the blossoms and pat dry. Add about an inch of oil to a medium pot and heat on medium-high.

In a small food processor, combine the feta and cream cheese and process until you get a nice whipped creamy consistency (about 30 seconds). Add in the pecans and blend until the nuts have been coarsely chopped and blended into the feta. 

Add the flour to a mixing bowl with the pinch of salt. Lightly whisk in the beer. Gently tease open each blossom and use a small spoon and your fingers to add 1-2 teaspoons of your feta filling. Gently close the blossom and twist the ends of the petals together. Drench each into the prepared batter and let any excess drip away. Fry each blossom in the oil separately for about a minute, using a slotted spoon to flip the blossom halfway through. Remove the blossoms from the oil and lay on a plate lined with a towel to absorb any excess oil while the blossoms cool.  


Thursday, April 20, 2017

A Little Weaving


A few months ago, I came across the tiniest cutest weaving loom that I absolutely could not resists picking up. I have been wanting to try weaving for so long, and this seemed like the perfect gateway. I learned the basic weave stitch, soumac stitch, and raya knots. My little weaving came out a bit rough and not sure why it kept getting smaller towards the top, but I had so much fun nevertheless. I was also able to use some beautiful scraps I had leftover of Quince and Co.'s Finch yarn in colorway Audouin, Moeke's Elena yarn in colorway Walnut, and Yoth's  Father yarn in colorway Poppy Seed. Now I'm dreaming of what to weave next. I have my eye on this book by the talented weaver Maryanne Moodie, this loom from Purl Soho, and their insanely beautiful woven scarf pattern released recently.

In other news, our spring garden is growing so well, and I have plans to till up a big space for cut flowers this weekend. If the harvest is good, we will be at the local farmer's market mid-summer! I also have doubled my cucumber and okra plants this year for more pickling. Those are just a few reasons that Spring is my absolute favorite season. I hope your Spring is off to a wonderful start, too!


Thursday, March 2, 2017

Rosemound Scarf for Taproot Magazine


So excited/honored/thankful to be a contributor in Taproot Magazine's first issue of 2017, WEAVE. I've always had the notion that art is anything that makes you feel. Anything that moves you. I remember the first time I held this magazine, not that long ago, and it surely gave me all the feels. Every single article was genuine and filled with so much love and soul. This magazine has become one of my favorite, if not my favorite, publication, and one that each issue I can peruse over and over again. If you are a creative, gardener, wanderer, homebody, mother, father, dreamer, or anyone who has the urge to slow down and take in some lovely words and photos take a peek at this wonderful magazine. You can find the WEAVE issue here and my Rosemound Scarf pattern on Ravelry here.


Thursday, December 15, 2016

A Gift in a Jar: Butterscotch Brownies

 
I hope you all are having a nice slow and cozy Advent and holiday season so far. I know these short days can be so hectic and not so cheery to many, and please know that I am thinking of you. I have learned over the past few years, this season, although filled with pretty lights, sweet gifts, and yummy treats, is most importantly a season of preparation and stillness. Remembering our sweet Savior's first coming into the world as a baby in a manger and preparing our souls for when He comes again. Thinking of Jesus' Earthly life is so comforting to me because it reminds me that he gets me. He fully understands the trials we are going through, and He is right by our sides, through every painful and every joyous moment.  I hope that thought comforts you too, and allows us all to be grateful for Him first, send extra love to others second, and soak in all the wonderful magical things this season brings third. 

In the spirit of Christmas and gift giving, I wanted to share a homemade project with you this year that you can cozy up indoors and make for your loved one.  It's a simple brownie mix that you could gift on it's own or pair it with an oven mitt for a little gift set that is sure to warm the heart and the belly. I paired my brownie mix with the oven mitt I designed for my crochet class on Skillshare. If you may be interested in making this little mitt, you can head over to my class to see how it's done. If you are already a crocheter, feel free to just download the pattern or skip over to the project videos.

I love using natural and simple materials when I create things whether it's gifts or just a little something for myself. I think it offers a peaceful and warm feel made with intention. I chose to use simple ingredients for the brownie mix that you most likely have on hand, and my oven mitt was made with pure American wool. For the wrapping, I used a natural linen fabric, a bit of twine, and a tree clipping. I very much hope you enjoy making this gift and gifting it! 
Brownie Mix:

1 1/4 cup flour
2 cups sugar
2/3 cup cocoa powder
pinch of salt
butterscotch morsels

Mix all brownie ingredients in a bowl with a handful of the butterscotch morsels. Slowly add the mix into a 1 quart mason jar pressing down the mix firmly into the jar as you go. I used the bottom of a small glass for this. Add another handful of morsels to top the jar off and close. Print out this label and add to the top of the jar. Place the oven mitt on top of the fabric, then the jar in the center of the oven mitt standing up. Gather the four corners of the fabric at the top of the jar and securing with the twine. Decorate with your tree clipping. 

Wednesday, November 30, 2016

Essential Crochet Basics Class for Skillshare


A few months back, I was contacted by Skillshare to see if I would be interested in creating a course for their platform. If you aren't familiar with Skillshare, they are an online learning community with tons of wonderful classes on a wide range of topics. I actually learned to knit by taking a Skillshare class in 2014, and talked about my experience in this post.  I was a bit hesitant at first, because I am quite a shy person. Throughout school, and even now, I would DREAD presentations, as I tended to sound as if I were running a marathon while giving my public speech. My husband, being the most incredibly supportive person he is, ended up convincing me to give it a try. Creating this class was no small feat for me. Not only am I camera shy, I am not so great with technology either, so the filming and editing portions of this class were a learning curve for me. That said, I LOVED designing this project and sharing my skills in this class. I don't know how people learned much of anything without the internet. The majority of my crochet skills were learned through kind people sharing their knowledge online. So although I feel uncouth as a teacher, I do hope this class can help others who are interested in this craft.

This class is brimming with basic crochet techniques including how to get started, basic stitches, and finishing techniques. You will learn how to crochet in rows and rounds. And you will walk away with the cutest oven-mitt to gift or keep for yourself. It is an intensive beginner class, but I wanted to teach all of the core crochet techniques that makeup most crochet patterns that students can come back to and reference as they work through other crochet projects.

So if you are interested in learning this craft, or if you are already a fellow crocheter and simply want to make the oven mitt class project, you can enroll in the class by following this link. The first 25 students can enroll at no cost. I really hope you enjoy the class!

Thursday, November 10, 2016

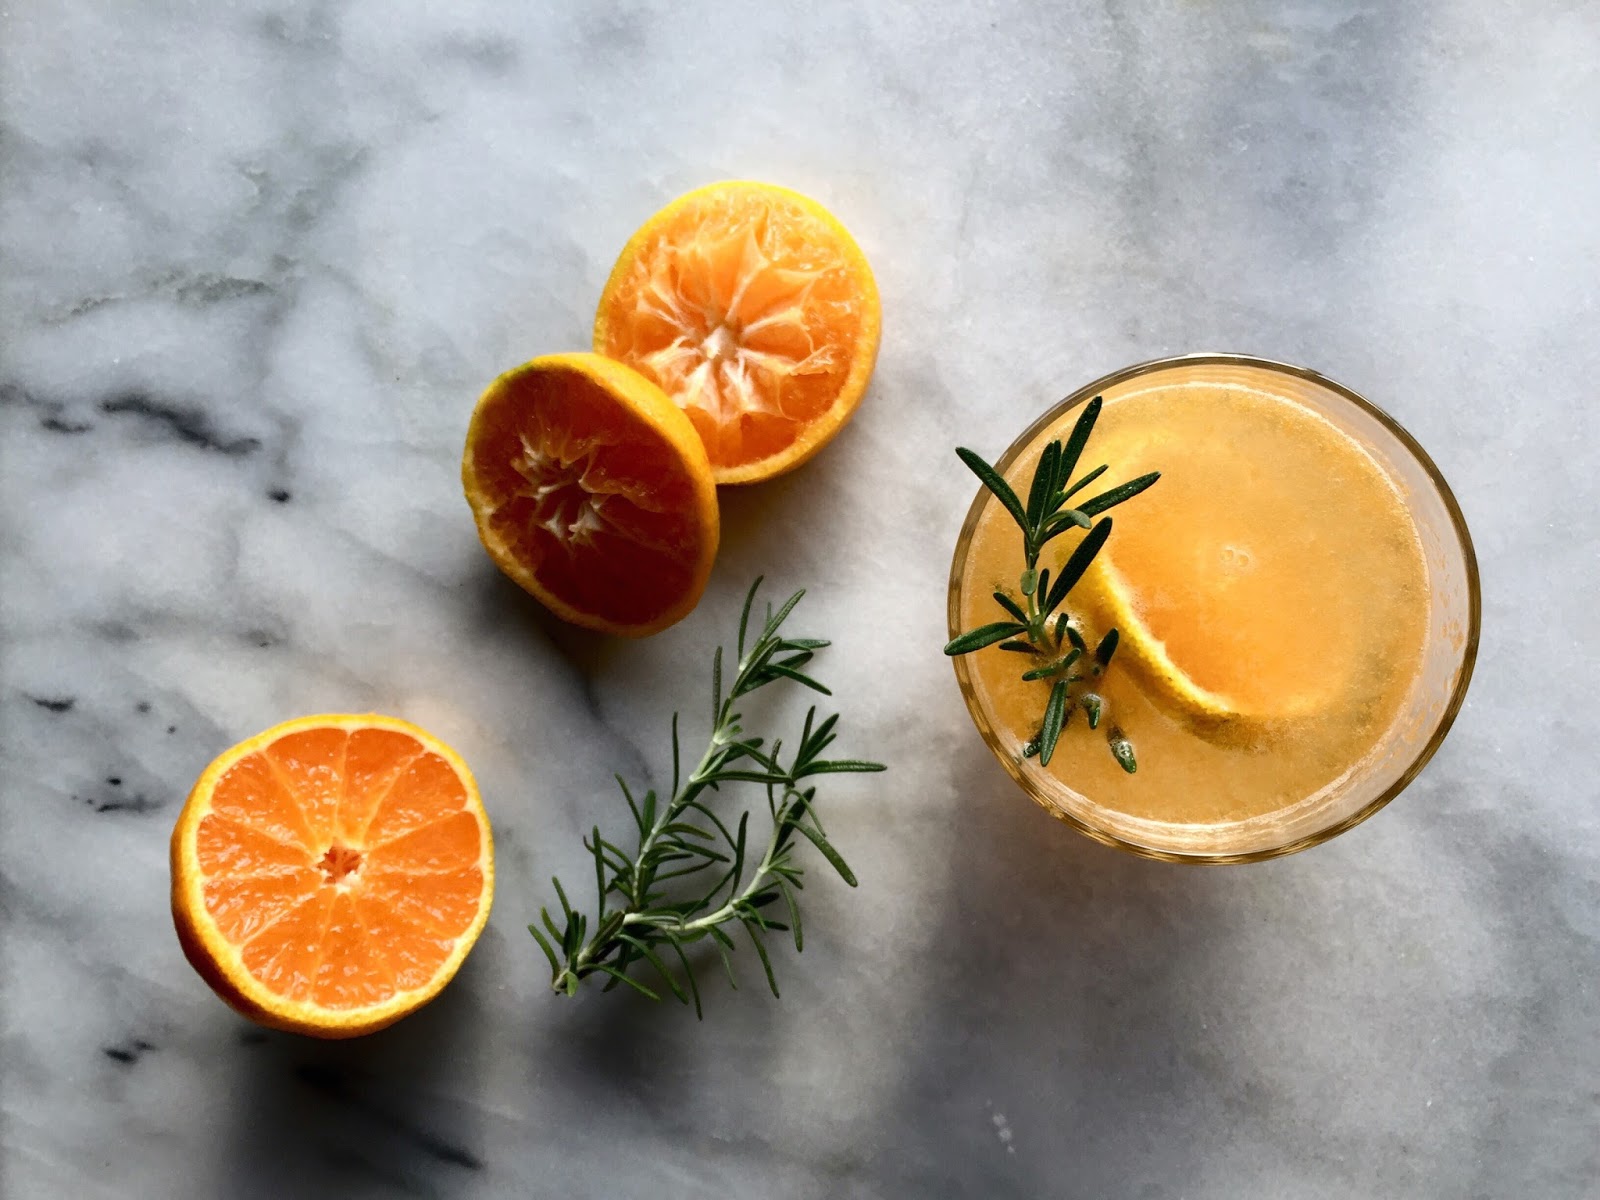
Rosemary Satsuma Fizz

This time of year in Louisiana, it is quite easy to spot an overfilled satsuma tree with its fruit weighing down its branches on a quiet street corner or neighborhood yard. When we moved into our house last year, we were so happy to find our very own baby satsuma tree growing in the backyard. Our satsumas are still ripening, but luckily there are plenty of this delicious little fall citrus to go around down here, so I get them in bag fulls from friends and family. I love a good gin fizz, so I thought I would substitute the lemon juice for satsuma juice and add in a hint of rosemary, which I also have growing wildly. It turned out so refreshing, but still tasted like fall. I hope you enjoy!

 Rosemary Simple Syrup

1 cup sugar
1 cup water
5-6 sprigs of fresh rosemary

Simmer sugar and water together in a sauce pan and stir until all the sugar has dissolved. Add the rosemary and simmer for about 5 minutes. Remove from heat and let it stand for about 10 minutes before removing the rosemary.

Rosemary Satsuma Fizz

1 oz gin
2 oz fresh satsuma juice
2 teaspoons rosemary simple syrup
sparkling water or club soda

Combine the gin, satsuma juice, and rosemary simple syrup into a cocktail shaker or mason jar with some ice and shake well. Pour the liquid into a cocktail glass and top with sparkling water or club soda. Garnish with a slice of fresh satsuma and rosemary.


Wednesday, November 9, 2016

Indigo Girls


After swooning over natural dyes for years (especially recently after this gem of a book was released) I finally stirred up a vat of indigo to play with. My very best friend and I spent a whole day experimenting with different patterns and designs on flour sacks, canvas bags, silk scarves, and of course yarn! I must say, my little fiber and textile loving heart was so full and happy.

Friday, September 16, 2016

Little Things


The Little Things posts are links to a few things I am loving lately. A good day revolves around good and happy moments, gratefulness, and  sometimes delighting in little things that make your heart smile. I hope these links bring a little joy to your day, too. 

A glad heart is excellent medicine.
Proverbs 17:22

I have never taken a Craftsy class before, but all of their bread classes are sure enticing.

This quote by Robert A. Ward is one of the most loveliest things I have ever read.

Brooklyn Tweed released their Fall collection this week, and I am swooning over the His and Hers heme. My favorites are the Auster design for him and the Spearheads design for her.

Another design released this week is Tavia, the sweetest most elegant and romantic knit skirt you could imagine. I already have an extra skein of Finch in this colorway, so I may just be casting on ANOTHER project this weekend.

This pan-fried fish recipe has been cooked for supper several times in the last few months at my house. It is simple and fresh and delicious. I highly reccomend!

I've added this rosewater facial spray to my daily routine after I apply my moisturizer in the morning and evenings and I love how fresh and clean it makes my skin feel!

Image via.

Thursday, August 25, 2016

Five Feet High and Rising


How high's the water, mama?
Two feet high and risin'
How high's the water, papa?
She said it's two feet high and risin'

We can make it to the road in a homemade boat
That's the only thing we got left that'll float
It's already over all the wheat and oats,
Two feet high and risin'
- Johnny Cash

We awoke to gray skies and muddy water inching in quickly from Bayou Manchac to the North and our creek to the south. It didn't come as any surprise that the creek had flooded, and in fact we had stocked up on groceries knowing we may be stuck on our side of the road for several days. It's when I stepped out onto the back porch and realized I could go fishing right off the edge into my backyard that I started to worry a bit. He advised me to use what water I needed and fill up the bath-tubs because he was shutting off the water pump before it became inundated. As i was filling up the kettle to make us coffee (because clearly my priorities were sound), he came in and decided we should quickly pack a bag and get out while we could. So, we and our dogs boarded a kind neighbor's pirogue and floated through our flooded little  street as our magnolia blooms waved us farewell. 

We didn't return until five days later, in another small kayak that a wonderfully nice stranger let us borrow. By the grace of God, our tiny blue house managed to stay dry. Out of the flood waters in the backyard, one little zinnia from my garden stuck through and I wanted to cry out of happiness and exhaustion. It is a bitter-sweet thought to know your home is safe, while your friends and family and community have lost so much. These days have been emotionally and physically taxing. We have spilled blood, sweat (so much sweat), and tears because of this flood. We have laughed and cried and hugged. Everyone is doing what they can to help, and through this devastation, it's so nice to be reminded how loving and kind our community is. I'm so proud to be a part of it. Stay strong my sweet sweet Louisianians. And to you non-locals, please keep us in your thoughts and prayers as we slowly but surely rebuild our home.

Wednesday, August 10, 2016

Deveraux Tank

I had the best summers growing up, and I love to reminisce and think about those hot sticky days when the non-existent phrase of my current lifestyle "I'm bored" was so easily tossed around. How wonderful it would be to be bored again. To pass the time, we would fill up our super soaker water guns and the wars would commence! Truces would be declared at the first sound of the ice-cream truck on our street. We would hurry to beg Mawmaw for ice-cream money, and then run as fast as we could to catch him before the music faded. Mawmaw and I would always get the fudgsicles, and I would happily sit drenched from our water gun fights and eat my cool delicious treat. Some days, Mawmaw and Pawpaw would bring us to our aunt's house, and we would swim until dusk only breaking for sustenance and the reapplication of our sunscreen. Other days, we would go fishing at various ponds and rivers and lakes, and Pawpaw taught us how to properly bait a hook with crickets and worms. You have to do it just so, or the bait will squirm off or the fish will nibble it right off your hook before you get the chance to set it. We would have fish fries in the afternoon with our day's bounty, and if we happened to not catch enough to feed the family, Mawmaw would run to the local Winn-Dixie to buy more. We had many lazy wonderful summer days, and I have mainly my grandparents to thank for that. So this design is dedicated to them, and all the wonderful summer memories they gave me. 
The Deveraux Tank is a sweet airy top made with Purl Soho's Linen Quill yarn. Linen Quill is a new Purl yarn, and I must admit, I was infatuated as soon as I saw it. I hurriedly purchased three skeins to experiment with, and this tank is what resulted. It was such a pleasure to work with, and has a wonderful drape about it with an ever so slight halo. And OH THE COLORS. So many beautiful colors to pick from (which they just so happen to have restocked!). 

Deveraux is worked in single crochet stitches with a split ribbed hem. The bust and straps are worked first, then the yarn is reattached to the bottom, and the piece is finished working down to the ribbed hem. The tank is worked in the round, so the only seaming is a few stitches to connect the straps at the top. I love the fit of the tank and how the fiber gets softer and more comfortable with each wear.

The approximate size of this tank is a medium (36-38" bust), however if you need to make it larger or smaller, simply adjust the foundation chain row by about 20 chains per size. You can find this pattern on Ravelry here.  I really hope you enjoy making and wearing this piece often. As always, please feel free to contact me with any questions! Also, a huge thanks to my beautiful dear friend Elizabeth for modeling.  

DEVERAUX TANK
Designed by Ashlyn Holmes

YARN
Purl Soho Linen Quill
50% Fine Highland Wool, 35% Alpaca, and 15% Linen
439 yards / 410 meters per 100 gram skein
2-3 skeins


FINISHED GAUGE
28 stitches and 22 rows = 4” in single crochet stitch

HOOK
·         3.5 mm

NOTIONS
·         tapestry needle

·         scissors

FINISHING
Weave in ends, and wet block 

PATTERN                
Bust
Chain (ch) 200 and join your yarn to the first ch made with a slip stitch (ss) being careful not to twist. Single crochet (sc) in each ch around. Sc into the first sc made, do not join. Continue to sc around until piece measures 9.5 inches long.

Straps (worked in rows)
Row 1: With your yarn still attached to the bust piece, sc in the next 20 stitches. Turn and ch1.
Rows 2-9: Sc in each sc across. Turn and ch 1.
Row 10: sc decrease (dec) in next 2 sc. Sc across to last 2 sc. Sc dec in last 2 sc. Turn and ch 1. (18 stitches)
Rows 11-13: Sc in each sc aross. Turn and ch 1.
Row 14: Repeat row 10. (16 stitches)
Rows 15-17: Sc in each sc across. Turn and ch 1.
Row 18: Repeat row 10. (14 stitches)
Rows 19-21: Sc in each sc across. Turn and ch 1.
Row 22: Repeat row 10. (12 stitches)
Rows 23-25: Sc in each sc across. Turn and ch 1.
Row 26: Repeat row 10. (10 stitches)
Rows 27-39: Sc in each sc across. Turn and ch 1.
Row 40: Repeat row 10. (8 stitches)
Rows 41-54: Sc in each sc across. Turn and ch 1.
Row 55: Sc in each sc across. Fasten off and weave in end.

Attach yarn 34 stitches over from the end of the first strap and repeat rows 1-55.
Attach yarn 26 stitches over from the end of the second strap and repeat rows 1-55.
Attach yarn 34 stitches over from the third strap and repeat rows 1-55.
Line up the tops of your straps and seam together. 

Attach yarn to any stitch on the neckband of the tank top, and sc around 3 times, doing a sc dec at the corners of the neckband each round to round out the neckband.

Attach yarn to any stitch on one armhole and sc around 3 times, doing a sc dc at the corners where the straps and tank meet to round it out. Repeat on other armhole. 

Waist
Attach your yarn to any ch stitch at the bottom of your tank. Sc in first ch stitch and in each around. Do not join. sc around making two sc increases (inc) in each round until you have added 20 additional stitches to your tank.  

Once the increases have been completed, continue to sc in the round without joining until your tank top length measures 23 inches, or your desired length. 

Hem (worked in rows)
Row 1: With your yarn still attached, half-double crochet (hdc) in the next 110 stitches. Turn and ch 1.
Row 2: (Front-post hdc (fphdc) into the next hdc, back-post hdc (bphdc) into the next hdc) repeat across. Turn and ch 1.
Row 3: (bphdc into the next hdc, fphdc into the next hdc) repeat around. Turn and ch 1.
Rows 4-6: Repeat rows 2 and 3. Fasten off and weave in end.

Attach yarn to the sc stitch directly next to the end of the front hem row with the right side facing.

Row 1: Hdc in the next 110 stitches. Turn and ch 1.
Row 2: (Fphdc into the next hdc, bphdc into the next hdc) repeat across. Turn and ch 1.
Row 3: (Bphdc into the next hdc, fphdc into the next hdc) repeat around. Turn and ch 1.
Rows 4-10: Repeat rows 2 and 3. Fasten off and weave in end.